
| Main Page > Browse Categories > VVEngine > Show All |
VVEngine |
| 01. What is VVEngine? |
VVEngine is a new add-on for ViceVersa PRO.
VVEngine is an advanced scheduler that lets you schedule all your ViceVersa profiles.
VVEngine lets you create profile chains and categories to run sequentially.
With VVEngine you can:
- Setup multiple profiles and profile groups
- Run profiles every X minutes, every X hours, every X days
- Exclude specific days / hours from the schedule
- Setup profiles to run as soon as file changes are detected
- Setup profiles to run when USB drives are detected
- Setup profiles to run when network connections are detected
- Do not start profiles if computer is using battery power (and/or battery level is low)
- Start profiles only if the computer IP address matches a specified value
- Start profiles only if all source and target folders in the profile are accessible
- Report an error if a profile has not run for more than X minutes
- Automatically re-run profiles if an error occurs
- Run one ViceVersa profile after another (sequentially)
- View profile history and results for the last 15 runs
- Control VVEngine with a browser, also from a different computer or remotely over the Internet
- Control VVEngine from VVConsole, a dedicated command line / scripting program
- Setup VVEngine to run as a service
- Report errors in the Windows Event Log
- New VVEngine Gadget for Windows 7 and Vista: put your profiles right on the desktop! Learn More
Download VVEngine from the VVEngine Home Page
See the extra features VVEngine offers VV PRO users in the Scheduling Comparison Chart
| 02. What Are the Requirements to Run VVEngine? |
To run VVEngine you need ViceVersa PRO 2 or newer installed (VVEngine is a ViceVersa PRO add-on).
VVEngine runs on Windows 11, 10, Windows 8, Windows 7, Windows Vista, Windows XP, Windows 2000, Windows Server 2003, Windows Server 2008 (all editions of these operative systems, including R2), Windows Server 2012 (all editions, including R2), Windows Server 2016 (all editions), Windows Server 2019 (all editions), Windows Server 2022 (all editions), Windows Home Server and Windows Small Business Server. VVEngine does not run on Windows 98, Me or 95. VVEngine is a 32-bit application, compatible with both Windows 32-bit and 64-bit.
To control VVEngine you need an Internet browser: Microsoft Internet Explorer 5.5 (or later), FireFox 1.5 (or later), Chrome, Opera or Edge.
| 03. Which Browsers are Supported by VVEngine? |
All modern browsers are supported, such as FireFox, Chrome or Edge.
Internet Explorer 5.5 (or later) is also supported.
VVEngine requires Javascript to be enabled. Usually Javascript is enabled by default.
| 04. How Do I Install VVEngine? |
- VVEngine requires ViceVersa PRO 2 or newer to run. If you do not already have ViceVersa PRO installed, you can download ViceVersa PRO here
- After installing ViceVersa PRO, download the VVEngine installer from http://www.tgrmn.com/web/vvengine/vvengine.htm
- If you have a previous version of VVEngine already installed see Upgrade VVEngine
- Start the installation process by running the downloaded file
- At the end of installation, VVEngine will start.
You connect to VVEngine with your Internet Browser. Start the browser (e.g. Internet Explorer or FireFox) and type http://127.0.0.1:8001 in the address bar. This unique address opens the VVEngine interface.
When you open VVEngine for the first time there will be no ViceVersa profiles scheduled. You can add a new profile by clicking on "Add Profile" on the main VVEngine page.
Notes:
- After installation, VVEngine will automatically run in the background each time you start Windows.
- VVEngine is installed for the current user. If you wish to install VVEngine as a service see the related article http://www.tgrmn.com/web/kb/item48.htm
| 05. Does VVEngine Start Automatically Every Time I Start Windows? |
Yes. Once VVEngine is installed, it will automatically start when you start Windows.
If you uninstall VVEngine, VVEngine will be removed and will no longer start when you start Windows.
| 06. What Ports and Protocols Does VVEngine Use? |
By default, VVEngine uses port 8001 and the HTTP protocol to communicate with your web browser. To connect to VVEngine, type http://127.0.0.1:8001 into your web browser address bar.
N.B.: By default, VVEngine only allows connections from the local computer (127.0.0.1). To allow connections from other computers, see: http://www.tgrmn.com/web/kb/item54.htm
| 07. Can I Connect to VVEngine from a Remote Computer? |
*** Requires VVEngine 1.1 or any later version ***
Yes, you can connect to VVEngine from a remote computer. You will need to change the default VVEngine settings in order to do this, because, by default, VVEngine only allows web browser connections from the local computer (IP 127.0.0.1).
- Select "Start" > "All Programs" > "VVEngine for ViceVersa PRO" > "VVEngine Settings".
- In the VVEngine Settings dialog box, enter the IPs that will be allowed to connect to VVEngine in the "Allowed IPs" field.
- Click on "Apply Changes". VVEngine will restart with the new settings.
- Click on "Close".
After this change, to connect from a remote computer, type http://<ip>:<port> into the web browser address bar on the remote computer.
<ip> is the IP of the computer where VVEngine is running.
<port> is the VVEngine HTTP port, usually 8001.
For example http://192.168.1.100:8001
Some 'Allowed IPs' examples
To allow only the local computer to connect to VVEngine (default):
Allowed IPs = 127.0.0.1
To allow the local computer to connect to VVEngine and the IP 192.168.1.1:
Allowed IPs = 127.0.0.1|192.168.1.1
To allow the local computer to connect to VVEngine and all IPs starting with 192.168:
Allowed IPs = 127.0.0.1|192.168.*
To allow the local computer to connect to VVEngine, all IPs starting with 192.168 and IP 10.10.10.10:
Allowed IPs = 127.0.0.1|192.168.*|10.10.10.10
To allow all IPs to connect to VVEngine:
Allowed IPs = *
| 08. Can I Use VVEngine to Run Profiles Manually? |
Yes, you can add profiles to VVEngine without them being part of a schedule and run them manually. You do this by clicking on 'Run Profile'.
Profiles without a schedule have the text 'Manually' written in the 'Next Run' field.
This allows you to organize your profiles into categories and see the profile history for the last 15 runs.
| 09: How Do I Use VVEngine to Run a ViceVersa Profile As Soon As a USB Drive Is Inserted? |
- Start VVEngine. Click on 'Add Profile'
- Select the ViceVersa profile you want to run when the USB drive is inserted
- Activate the option 'Run Immediately As Soon As Source and Target are Accessible'
- Click 'OK'
Your profile has now been added to the VVEngine list. As soon as all the sources and targets in the profile are accessible VVEngine starts the profile to synchronize, replicate or backup your files.
| 10. How Do I Use VVEngine to Run a ViceVersa Profile As Soon As the Network Is Accessible? |
- Start VVEngine. Click 'Add Profile'
- Select the ViceVersa profile you want to run when the network is accessible
- Activate the option 'Run Immediately As Soon As Source and Target are Accessible'
- Click 'OK'
Your profile is added to the VVEngine list. As soon as all the sources and targets in the profile are accessible, VVEngine starts the profile to synchronize, replicate or backup your files.
Note: network detection can take a couple of minutes.
If you want to start the profile only once an hour, once a day or once a week (i.e. you disconnect and reconnect to the network multiple times but only want the profile to start every hour, day or week) select 'Hourly', 'Daily' or 'Weekly' instead of 'Immediately'.
| 11. How Do I Run One Profile After Another? |
With VVEngine you can run multiple ViceVersa profiles sequentially.
You can do this in 2 ways:
Manual Runs: Add the ViceVersa profiles to VVEngine with no scheduling options set and make all of them part of the same category. When you want to run all the profiles in the category, select the category and click on "Run All" in VVEngine. "Run All" runs all the profiles in the current category.
Scheduled: Add the ViceVersa profiles to VVEngine. For the first profile, change the schedule and set the "After this profile, run ..." to the profile name of the second profile. Then open the second profile's schedule and set the "After this profile, run ..." to the profile name of the third profile and so on. Note that only the first profile needs to have a schedule set, because the second, third, etc. will run sequentially after the first one.
| 12: What Are the Advantages of Running VVEngine as a Windows Service? |
Running VVEngine on a Windows Server as a Windows Service allows you to keep VVEngine running even when no one is logged onto the server. It also allows you to run VVEngine under a different account from the current logged-in account.
When VVEngine is installed as a Windows Service, you are still able to control it with a web browser and from a remote machine.
See How Do I Install VVEngine as a Windows Service? and Control VVEngine From a Remote Computer
| 13. How Do I Setup VVEngine as a Windows Service? |
*** Requires VVEngine 1.1 or any later version ***
- After installing VVEngine (see http://www.tgrmn.com/web/kb/item47.htm) go to the installation folder (usually c:\program files\vvengine\)
- Open the subfolder "Serv".
- Double-click on the file "Service - INSTALL VVEngine as Service.bat" This script will install VVEngine as a service. You will need administrator privileges to be able to do it. Note: this script will stop any VVEngine profiles that are running before installing VVEngine as a service.
- Open the Windows Service Console. You should now see VVEngine in the list of installed services.
- Right-click on the "VVEngine service" and select "Properties" from the menu. Click on the "Log On" tab and select which account will run the VVEngine service. If you plan to schedule synchronizations or replications over the network, an account with network access needs to run the VVEngine service, e.g. Administrator
- After having selected the right account, click on the button "OK" and start the service by right-clicking on the service name and selecting "Start" from the menu.
- As a service, VVEngine will keep running even if no one is logged onto the computer.
- You can connect to VVEngine from any computer in the network by typing http://<ip>:8001 into the web browser address bar. <ip> is the IP address of the computer on which VVEngine is running (for example http://192.168.1.100:8001). See http://www.tgrmn.com/web/kb/item54.htm for more information.
Please Note:
VVEngine saves its settings and the profile list in a file called VVEngine.xml This file is kept in the folder c:\Documents and Settings\<account>\Application Data\VVEngine (where <account> is the account name running VVEngine).
If you install VVEngine as a service under a different account and you want to maintain the profile list, you will need to copy this file from the old account location to the new account location.
Additional Information:
- Services do not have access to mapped network drives: use UNC paths in the ViceVersa profile settings if you plan to run VVEngine as a Windows Service and need to access the network.
- The local system account does not have access to the network at all. Use the NetworkService account or a user account with network access if you need to access the network.
- If a password to access the network is needed, enter it in profile settings -> folders -> network in the ViceVersa profile.
- If the password to access the network expires or changes, it needs to be re-entered.
- If the account password for the account running the VVEngine service is changed or expires the VVEngine service will stop working. An event is logged in the Windows Event Log. You'll need to re-enter the password in the service properties. Best practice is to use a dedicated account to run the VVEngine service with a password that does not expire.
- To use Volume Shadow Copies, backup / restore privileges are required (use an account member of the Backup Operators group or Administrators to run the VVEngine service).
| 14. How Do I Uninstall VVEngine? |
You can remove VVEngine like any other Windows program. The uninstall procedure will completely and cleanly remove VVEngine from your computer.
Follow these steps:
Windows 11, Windows 10, Windows 8, Windows 7, Windows Vista, Windows Server 2022, 2019 / 2016 / 2012 / 2008
- Go to the Start menu > Control Panel. (Learn how to access the Control Panel)
- Click Programs and Features.
- Double-click VVEngine.
- Click Yes when asked to confirm that you want to uninstall VVEngine.
- The uninstall procedure will completely and cleanly remove VVEngine from your system.
Windows XP, Windows Server 2003, Windows Server 2000
- Go to the Start menu > Control Panel.
- Click Add or Remove Programs.
- Double-click VVEngine.
- Click Yes when asked to confirm that you want to uninstall VVEngine.
- The uninstall procedure will completely and cleanly remove VVEngine from your system.
| 15. How Do I Run a Profile Once a Week, on Monday at 2 PM? |
To schedule a profile to run at a specific time, for example once a week, on Monday at 2 PM, set the profile schedule as follows:
- Run Every Day
- Start Time 2:00 PM
- Don Not Run on: Tue, Wed, Thu, Fri, Sat, Sun (exclude each day but Monday)
This schedule will run the profile every Monday at 2 PM.
| 16. How Does VVEngine Compare with the Other Scheduling Tools Available for ViceVersa PRO? |
See the extra features VVEngine offers in the Scheduling Comparison Chart
| 17. VVEngine and Firewalls |
By default VVEngine uses the HTTP protocol on port 8001 to communicate with your browser. If you are unable to access VVEngine on http://127.0.0.1:8001 with your browser, make sure your firewall is not blocking VVEngine. See also http://www.tgrmn.com/web/kb/item50.htm
| 18. Can I Restrict Access to VVEngine with a Password? |
*** Requires VVEngine 1.1 or any later version ***
Yes, you can restrict access to VVEngine with a password. To setup a password, follow the steps below:
- From the Windows Taskbar, select "Start" > "All Programs" > "VVEngine for ViceVersa PRO" > "VVEngine Settings".
- In the VVEngine settings dialog box, enter the access password in the "HTTP Password" field.
- Click on "Apply Changes". VVEngine will ask you to confirm the password you entered and then restart.
- Click on "Close".
VVEngine will now require a password when connecting with a web browser.
| 19. Can I Change the HTTP Port Used by VVEngine? |
*** Requires VVEngine 1.1 or any later version ***
Yes, you can change the HTTP port used by VVEngine.
The default port is 8001. This can be changed if conflicts occur with other applications.
- From the Windows menu, select "Start" > "All Programs" > "VVEngine for ViceVersa PRO" > "VVEngine Settings".
- In the VVEngine settings dialog box, enter the new port in the "HTTP Port" field.
- Click on "Apply Changes". VVEngine will restart.
- Click on "Close".
| 20. RSS Feeds |
*** Requires VVEngine 1.1 or any later version ***
VVEngine supports two RSS feeds (three since version 2.0) that can report the latest run for each enabled profile in VVEngine. The VVEngine feeds are accessible via any RSS reader. The feeds are accessible at:
http://<ip>:<port>/rss.xml (eg http://127.0.0.1:8001/rss.xml or from a remote computer http://192.168.1.1:8001/rss.xml)
and
http://<ip>:<port>/errors.xml (eg http://127.0.0.1:8001/errors.xml or from a remote computer http://192.168.1.1:8001/errors.xml, this feed only reports profiles with errors)
and
http://<ip>:<port>/rssall.xml (eg http://127.0.0.1:8001/rssall.xml or from a remote computer http://192.168.1.1:8001/rssall.xml, this feed reports all profiles, including disabled profiles. This feed is only available in VVEngine version 2.0 or newer)
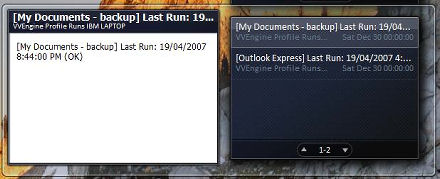
VVEngine RSS Examples
Google Desktop Gadget OneFeed showing VVEngine RSS feed
Windows Vista Sidebar Gadget showing VVEngine RSS feed
| 21. The ViceVersa Profile Path changes to 'c:\fakepath\...' in VVEngine when using Internet Explorer 8 |
This issue is caused by a new security feature added to Internet Explorer 8. Updating to VVEngine 1.1 Build 07 (or newer) fixes this problem.
| 22. About the VVEngine Desktop Gadget |
*** Requires VVEngine 2.0 or any later version ***
Keep an eye on VVEngine! The VVEngine Gadget puts VVEngine right on your desktop.
You can keep track of what's happening in VVEngine while you work. You can run and check profiles right from your desktop. You can position the gadget anywhere on the screen, move it and resize it as you like.
The VVEngine Gadget is available for Windows 7, Vista or newer. It requires VVEngine 2.0 or newer to be installed.
| 24. Real-Time Backup / Replication / Synchronization with VVEngine and ViceVersa |
NEW: Real-Time, Super-Fast, No Rescanning Execution. Monitor source and/or target folders for changes at file or subfolder level, and then backup, synchronize, replicate files without folder rescanning. Essential over slow connections and for real-time execution with a large amount of files. Plus VVEngine keeps track of all the changes happening so they can be reviewed.
*** Requires VVEngine 2.1 or newer, Server Premium Edition or Client Edition ***
 How to setup Real-Time execution in VVEngine.pdf
Overview of the New VVEngine Real-Time Functionality
In the standard backup / replication / synchronization routine, Source and Target folders are analyzed to look for file changes. The folders are scanned, their content is compared file-by-file and a list of file changes is built based on timestamps and/or size. Then the new files, or the files that have changed, are copied or deleted, as needed.
This process works well, but it is suboptimal in some circumstances where repetitive rescanning of source and target folders takes a long time. For example:
-
Over slow network connections.
-
Handling a large amount of files.
-
If backup, replication or synchronization must be real-time or as fast as possible.
For improving performance in the above situations, VVEngine 2.1 now offers some new capabilities which are described below.
The first time the profile runs, source and target folders are fully scanned and analyzed. However, after the first run VVEngine no longer scans source and target. Instead, it monitors source and target and keeps track of all file changes. Then, when the profile runs, VVEngine and ViceVersa use this information to apply the changes without the need to re-analyze the entire file set. This means that the total amount of files to backup, replicate or synchronize is no longer a factor, as changes are detected in real-time. Plus all of this happens without using extra computer resources: the file monitoring relies entirely on the standard Windows functionality and does not need any new file system driver or special service to be installed.
This new real-time capability is implemented as a new option in the VVEngine scheduling settings. The option is called "Monitoring Level". Monitoring level can be set to one of the following values:
Full Rescan: When a file change is detected, a profile run is initiated. The source and target folders are fully rescanned to find out which files have changed since the last run. This is the standard change detection functionality: source and target are fully rescanned on change detection.
Subfolder Level: Changes are detected and tracked at subfolder level. When a file change is detected, a profile run is initiated. However only the sub-folders where the file changes have occurred are rescanned which significantly improves performance. This is part of the new real-time capability of VVEngine.
File Level: Changes are detected and tracked at file level. When a file change is detected, a profile run is initiated. However only the files with changes are rescanned. This speeds up the profile execution significantly. This is part of the new real-time capability of VVEngine.
The new Subfolder Level and File Level monitoring do not require full rescanning of source or target like Full Rescan. This speeds up execution substantially especially over slow connections or when dealing with a large amount of files.
The difference between Subfolder Level and File Level is that File Level monitoring is more detailed, detecting changes at file level instead of just at subfolder level. However, because of the level of detail, it may result in more Overflow situations. Overflow situations force a full rescan if some changes are missed. For most applications, Subfolder Level monitoring will suffice.
Note: Subfolder Level and File Level detection options are only available in the VVEngine Server Premium edition or in VVEngine for Windows 11, 10, 8, 7, Vista, XP, 2000. They are not available in the VVEngine Server edition.
The following PDF document contains detailed instructions on how to setup Real-Time backup for Continuous Data Protection, replication or synchronization in VVEngine: How to setup Real-Time execution in VVEngine.pdf
| 25. How to Monitor All ViceVersa and VVEngine Profiles Running on Multiple Servers from a Single Central Server |
An easy way to monitor all ViceVersa and VVEngine profiles that are running on multiple servers from a single central server, is to use the Windows Server Manager.
Just add all the servers that need monitoring to the Server Manager on the main server and once that is done all VVEngine profiles running locally or remotely can be monitored from there.
How?
VVEngine logs all profile failure events in the Windows Application Log. These events can be shown in the Server Manager, collected from multiple servers. If an error with a profile that is running on a remote VVEngine is detected, it is then possible for the server admin to connect to that specific VVEngine to see all the details with a Web Browser, using IP address plus the VVEngine port.
Also if VVEngine is setup to run as a service, then any service failure with starting/stopping can be monitored locally and remotely via the Server Manager.
There are also other ways to report failures. For instance, an e-mail can be sent by each profile in case of profile failure to a specific e-mail address. E-Mail notifications are set in the profile settings.
| 26. VVEngine with Microsoft Edge based on Chromium |
The new Microsoft Edge is based on Chromium and was released on January 15, 2020. It is compatible with all supported versions of Windows. Downloading the browser will replace the legacy version of Microsoft Edge on Windows 10 PCs.
VVEngine is fully compatible with the new Microsoft Edge based on Chromium.
| 27. Monitoring Multiple VVEngine Installations via the REST API and JSON |
Starting with version 2.2, Build 2230, VVEngine now supports querying the status of its scheduled profiles via a REST API. The returned information is formatted as JSON objects.
The status of the profiles can be queried at URLs /profiles/ and/or /profiles/status/.
This is useful for remote monitoring of multiple VVEngine installations running on the network, using server monitoring software and/or network sensors.
It is recommended that you use the new VVEngine REST API and its JSON returned objects to monitor multiple VVEngine remotely.
Here is an example of a query via HTTP:
http://10.10.0.1:8001/profiles/
returning JSON:
{
"profiles":[
{
"_list":"http:\/\/10.10.0.1:8001\/profiles\/",
"_self":"http:\/\/10.10.0.1:8001\/profiles\/copyattr.fsf\/",
"category":"Unfiled",
"current_time":"Wed, 29 Jul 2020 07:39:44 GMT",
"description":"",
"last_exit_code":13,
"last_run":"Error - 7\/27\/2020 2:55:27 PM until 2:55:30 PM (3 sec) - (Manual Run) - Source folder not found.",
"last_successsful_run":"None",
"name":"copyattrtest.fsf",
"next_run":"None",
"path":"C:\\ViceVersa PRO\\copyattr.fsf",
"schedule":"Run manually",
"status":"Disabled",
"status_details":"",
"status_has_any_errors":false,
"status_has_any_errors_or_disabled":true,
"status_is_active":false,
"status_is_disabled":true,
"status_is_error":false,
"status_is_exec_error":false,
"status_is_not_avail":false,
"status_is_pending":false,
"status_is_running":false,
"url":"http:\/\/ 10.10.0.1:8001\/profile.htm?SHOWPROFILE=C%3a%5c%5c%5ccopyattr%2efsf",
"url_summary_status_json":"http:\/\/ 10.10.0.1:8001\/profiles\/status\/"
}
]
}
or
http://198.152.1.10:8001/profiles/status/have_any_errors_or_disabled/
returning:
{"have_any_errors_or_disabled":0}
If this exact string is not returned {"have_any_errors_or_disabled":0} then VVEngine is down or there are some profiles that have errors or are disabled.
Full description of the VVEngine REST API is available in the VVEngine manual.
To allow access to the VVEngine REST API from a remote computer, make sure you allow remote connections to VVEngine in the VVEngine settings, and also make sure that HTTP traffic on the port where VVEngine is running is allowed through the network firewall. Can I Connect to VVEngine from a Remote Computer?
| 28. Profile Filters and Real-Time Change Detection |
Starting with version 2.2, build 2230, VVEngine now considers the file and subfolder filters present in the profile settings also during real-time change detection.
If a change happens to an excluded file or in an excluded subfolder, it is then excluded from change detection too, which means that a change to an excluded file or in an excluded subfolder does not trigger a superfluous extra profile run anymore.
Note that not ALL file/subfolder filters will be taken into consideration.
Only absolute filters (filters with a drive or network full path, such as exclude c:\folder\*, for example) and file mask filters (include *.txt or exclude [1-9], for example) will be taken into consideration. Relative filters (such as \folder\) will not be taken into consideration.
When a filter is not taken into consideration, the change will be detected to a file or in a subfolder even if it is excluded in the profile settings and ViceVersa will run and will then exclude that file/subfolder anyway during execution: this might result in an unnecessary extra run. Before VVEngine version 2.2 (build 2230) all filters were ignored during change detection and the profile would always run.
More information is available in the VVEngine manual.